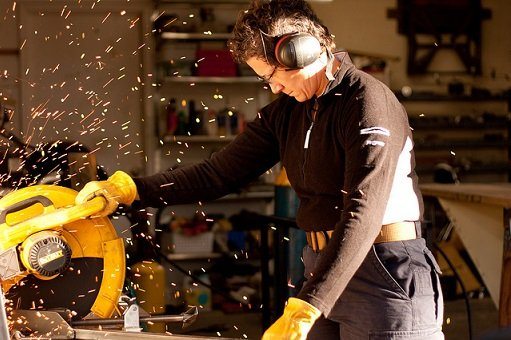

Chop saws are used to make cuts in all kinds of materials, including metals, stone, tile, ceramics, PVC, and just about anything else under the sun. Like all power tools, chop saws require periodic maintenance.
If you’ve been using a metal chop saw and noticed that it is laboring a bit more than it used to while making cuts, you may have a dull blade. If you’re new to power tools, you may wonder, “How on Earth do I change a metal chop saw blade?” Fear not, dear reader, this tutorial will walk you through the simple process.
[tcb-script async=”” src=”//pagead2.googlesyndication.com/pagead/js/adsbygoogle.js”][/tcb-script][tcb-script](adsbygoogle = window.adsbygoogle || []).push({});[/tcb-script]
Understanding a Chop Saw
[tcb-script async=”” src=”//pagead2.googlesyndication.com/pagead/js/adsbygoogle.js”][/tcb-script][tcb-script](adsbygoogle = window.adsbygoogle || []).push({});[/tcb-script]
First and foremost, you must understand your metal chop saw. Unlike miter boxes equipped with a toothed steel blade, metal chop saws are equipped with a special abrasive blade. The blade is actually best described as an abrasive disc, or wheel, made of aluminum oxide and fiberglass. The wheel is typically 16-inches in diameter, although 12 and 14-inch blades are available.
Also its come in various thicknesses, usually an 1/8th of an inch or slightly less. Chop saws are typically only for straight, ninety degree cuts, unlike a miter saw which allows for angled and compound angle cuts. The abrasive wheel moves up and down on an arm.
Keep Safety in Mind
Given the abrasive wheel’s ability to cut through metal, it’s incredibly important to pay attention to safety when anywhere near a chop saw: if it can cut through metal, it can cut through you. For starters, ensure the power button is turned off before beginning to consider working on it.
Unplug the saw from the wall, then move the power cord so it’s not a tripping hazard. An optional step for safety is wearing protective gloves; even if it isn’t turning the abrasive wheel can scrape away skin if you’re not careful.
Have the Right Tools on Hand
[tcb-script async=”” src=”//pagead2.googlesyndication.com/pagead/js/adsbygoogle.js”][/tcb-script][tcb-script](adsbygoogle = window.adsbygoogle || []).push({});[/tcb-script]
To remove the abrasive wheel, you’ll need either a hex or socket wrench. The standard size is 8-mm, but, as always, you’re best checking your owner’s manual just to be certain. Some saw manufacturers save you the hassle of searching for the appropriate sized wrench by attaching one in a storage slot or chain at the base of the saw.
If you’re fortunate to be using the latest DeWalt chop saws, you may not need any extra tools. DeWalt recently began using a quick-release system that is beyond the scope of this tutorial.
Lock the Tool Arm and Abrasive Wheel
Chop saws move up and down on a tool arm. There should be a locking mechanism that secures the arm to prevent any vertical movement of the wheel. Next, lift the blade guard to gain access to the spindle the blade rests upon.
You should find a button located near the spindle or on the tool arm that will lock the wheel into place, preventing it from spinning. As always, consult with your owner’s manual if there’s any uncertainty. At this point, you’re ready to change the abrasive wheel.
Carefully Remove the Abrasive Wheel
With the blade secured, place the hex or socket wrench on the bolt that holds the blade tight. Turn the bolt counter clockwise; if the bolt sticks, consider spraying it with WD-40 or extending the lever arm of the wrench. Remove the bolt. After removing the bolt, you’ll find a washer and flange, which you’ll need to remove as well.
Now, you’re free to remove the abrasive wheel. This is a good time to use a cloth to wipe the spindle, blade guard, bolt, and both of the flanges. (There’s a washer and flange that sit interior the abrasive wheel, too).
Install the New Wheel
With all the parts cleaned, take a few moments to inspect the chop saw and the new blade. Before installation, double check your replacement blade is the right diameter and thickness. Slide the wheel onto the spindle, follow this by sliding the flange and washer flush to the blade. Place the bolt on the spindle, and hand-tighten, stopping for another quick visual inspection.
If everything looks good, use the wrench to tighten the bolt, but despite the temptation, do not over tighten. Lower the safety guard, tighten any bolts you may have loosened to raise it, then unlock the tool arm and blade lock. The abrasive wheel should now spin freely.
One Last Step
Just to be certain everything is in working order, turn the blade by hand a few times. Wear gloves! Be certain that the blade is sitting at the proper angle relative to the spindle. Plug the saw back in and turn it on. Look for any play or wobble in the blade. If it’s turning normally, you’re good to go!
Conclusion
And that’s all there is to it. Feel free to share this article with anyone you think would benefit. Are you ready to try changing your own metal chop saw blade now? Although the process seems tedious, we promise that it will go very quickly with some practice. Keep safety first and foremost in your mind. Do you have any tips or trick you use when changing chop saw blades? If so, please let us know in the comments.

The content is so helpful and informative as you have covered all point step by step about changing blade a chop saw.
you know, that i have bought a chop saw before three days but mistakely i have damaged the blade because i was not idea that how to drive properly. Now i want to change blade so i search for that reason and finally i got an idea from this helpful article. thanks a lot