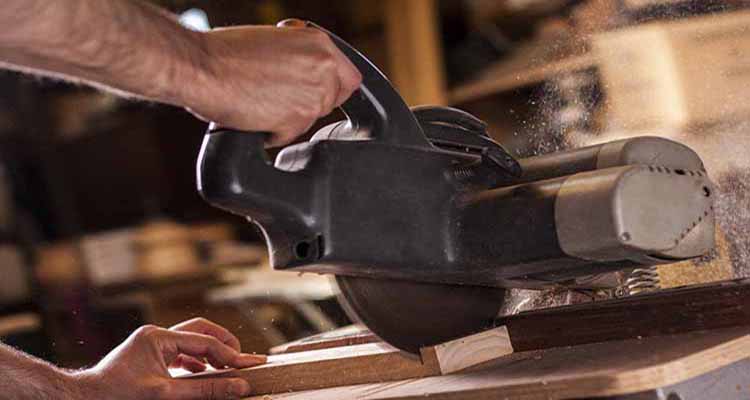

Are you noticing that your compound miter saw labors a bit? That the blade leaves scorch marks? Check the blade teeth, are they covered with wood resin? If the answer to any of these questions is yes, it’s time to learn how to change a miter saw blade; yours is dull. Fear not, we’ll walk you through the process below.
This maintenance could end up saving costly repairs, plus make your saw sing like it used to. Having ruined more than one project with a dull blade, I know the importance of proper maintenance. To save yourself a similar headache, keep reading.
Step by Step Guide for Changing Miter Saw Blade
1. Unplug Your Power Source

Any time you’re working with tools, keep safety first and foremost in your mind. Most accidents are preventable. Before doing anything else, unplug the saw from the outlet. Next, take the cord and tuck it away so that no one will trip over it.
While this may seem like a no-brainer, you’d be surprised how many professional skips over this step. No matter how much of a hurry you’re in, keep in mind that unplugging a piece of equipment for maintenance may save you a trip to the ER. Or worse.
2. Retract Blade Guard and Loosen Screw that Secures Blade Guard

Most modern miter saws are equipped with a plastic blade guard that retracts when the saw arm is depressed. To expose the blade, manually retract this guard. You should find a screw that keeps the blade guard arm in place. Using a screwdriver, loosen the screw.
This should allow you pull the blade guard arm away from the saw. Move the blade guard arm away from the saw; it should stay in place.
3. Press Blade Locking Pin, If Equipped
If your saw has a blade locking pin, engage it. This feature is available on many newer saws. Locking pins may be found in a variety of locations, so check your owner’s manual if you’re not sure. While engaged, the blade locking pin prevents the saw blade from spinning while you’re working on it. This makes blade removal both safer and easier. If your saw doesn’t have a locking pin, skip to the next step.
4. If No Pin, Set Blade in Wood to Prevent Spin
Place a block of scrap wood on the miter table, and then clamp it tight to the fence. Depress the saw arm so that the blade’s teeth engage the wood. This has the same effect as the locking pin – it keeps the saw blade from turning while you work on it. It’s not as safe as the locking pin, but for older saws, it’s still the best option.
5. Turn Bolt that Holds Blade in Clockwise Motion

In most cases, you’ll need a hex wrench to loosen the bolt that holds the miter saw blade in place. Turn clockwise. If the bolt is stuck, try spraying a silicon-based lubricant such as WD-40 on the bolt and waiting a bit. Or, try holding the hex-wrench in place and gently tapping with a hammer. Remove flange, then the blade. Again, keep safety in mind: use caution while handling the blade – even dull blades can injure you!
6. Optional Clean Blade
Depending on your situation, this is a great time to clean the blade. Oven cleaner works on saw blades. Take the blades outside, spray on the cleaner, then wait about 20 minutes before wiping off with a rag. Repeat if necessary. If you plan to sharpen the blade, send it off to have it professionally sharpened.
7. Mount New Blade
To get your saw in working order, reverse the process you used to remove the blade. Fit the new blade to the saw, taking care to keep your hands away from the teeth – they’re sharp! Replace the flange and hand-tighten the bolt, turning it counterclockwise. Use the hex wrench to fully tighten the bolt. While it’s tempting to use a lot of torque tightening the bolt, don’t. You’re only serving to put undue stress on the blade and mounting fixtures.
8. Unset Blade Locking Pin, if Equipped
If your saw is so equipped, disengage the blade locking pin. Spin the blade by hand to make sure it’s free of obstruction. Also, this is a good time to check for any wobble in the blade and perform a quick visual inspection for any signs of wear before. operating the saw.
9. Tighten Screw to Blade Guard
Manually pull the blade guard lever arm down, keeping the guard retracted. Tighten the blade guard screw. This should lock the blade guard arm in place, allowing the blade guard to cover the blade. Manually retract the blade, making sure it is in good working order.
10. Get Back to Enjoying Your Saw

Now your saw should be as good as new. It’s a great time to take one final visual inspection before plugging your saw back in. If everything looks to be in order, plug it in, and get back to work making precise cuts. You should notice that cuts take much less effort, and see fewer scorch marks on the wood. It’ll also preserve your saw’s motor; regularly changing blades can keep your saw running for many years to come!
Conclusion
And there you have it! By following the ten steps above, you should be able to easily and safely change your dull miter blade. As a carpenter, I see far too many people using dull blades and quickly wearing out their saws when there’s a really quick fix. Remember, that sharp blades make for more enjoyable and accurate miters. Not only that, but sharp blades help prevent from stressing the saw’s motor.
Did you enjoy this tutorial? Please share with others who may benefit from it. Do you have experience with changing miter saw blades? Anything that you’d do differently? If so, please comment below.

